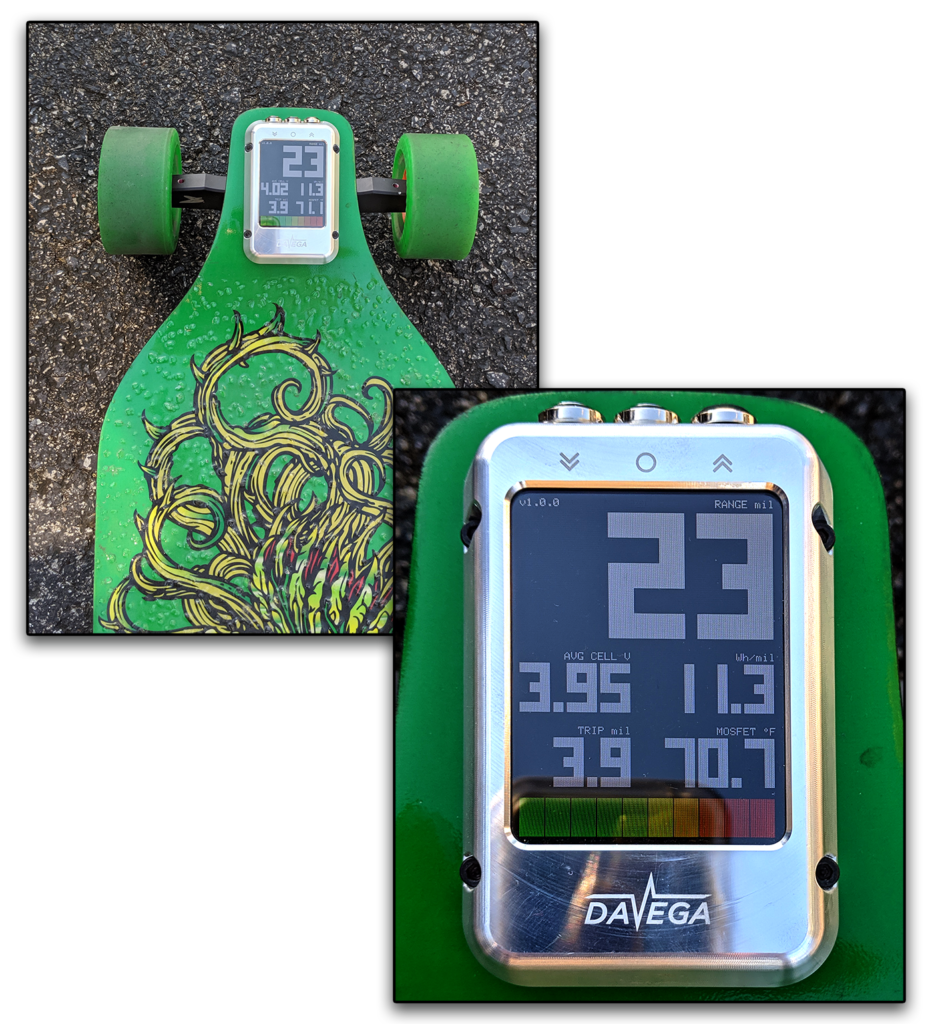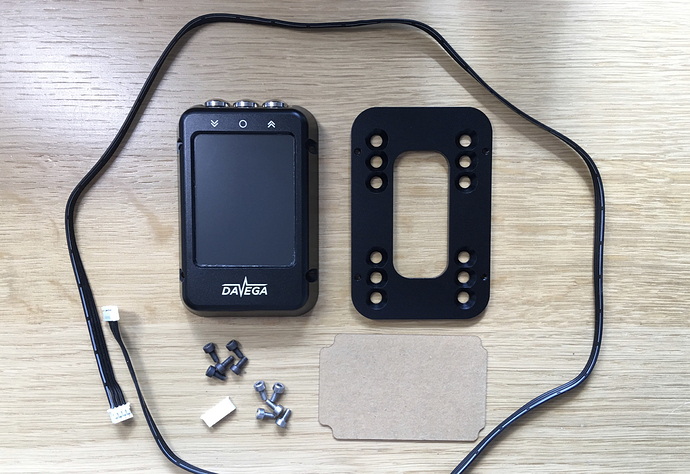

As some of you know, I have had a desire/want/need for reliable telemetry for quite a while. I have tried most remotes that are telemetry enabled including the Firefly, Photon, etc. None of these has provided the telemetry I wanted while also being a reliable and robust remote. A few months ago Jan Pomikálek, aka @janpom came up with the DAVEGA. Instantly I was intrigued. This was a solution that offered a customizable telemetry/metrics display while taking the remote requirements out of the process. This, to me, was an incredible idea and excellent example of the KISS principle.

Fast forward to today. A new version of the DAVEGA, called the DAVEGA X is in the wild, used by more than a few people, including me. It’s easy to see how Jan has been so successful with this esk8 accessory.

From an installation and configuration PoV it is elegant. The DAVEGA X includes a self-contained configuration menu (no PC connection or config file edits needed), Wi-Fi support for firmware updates, an aging log for hardware and customizable UI/Display.

From the user PoV, the DAVEGA X is phenomenal. The telemetry display is simple, elegant and easy to read. The customizable UI is a great option, even though I did not find it necessary to change anything, the speed and average WH usage displays are exactly what I want to see during a ride. Specifically you can change the main indicator from speed to motor current or battery current. The well-defined font used in the UI is easy to read in fast glimpses and makes for a safer read & ride than using a phone or remote. Let me explain…


While riding, most of us have a focal point between 8 and 20 feet from eye to object, that object being the road directly in front of us and a few feet beyond. When looking at the DAVEGA X the focal point remains very close to the road directly in front of you. When looking at a phone or remote, the focal point is vastly different and takes longer to recover from. This is, to me, an attractive and useful “in practice” feature.

The @LR-Design case is easy on the eyes and makes excellent use of space. Being brushed aluminum, anodized or raw, makes it rugged plus it takes a lot of punishment. The front facing buttons originally seemed like an issue to me, but after 100 miles or so, they still work great and show zero wear. This includes riding in wet and sandy conditions.

There are no specific warranty terms, they are on the way, but this is what Jan had to say.
“I stand by my product. If there’s a defect that the user hasn’t caused themselves, I’ll repair it for free or send them a replacement. I should even be able to restore the data on it provided they have an in-cloud backup (the new feature you probably noticed). So far I only had to repair one and that was a beta-testing piece that has been through quite a bit of beating.”
The installation process is very simple. Connect the supplied VESC UART cable to the DAVEGA X on one side and the V(ESC) on the other, it will only insert one way so don’t force it. In the V(ESC) config Set the BAUD rate to 115200 bps and the control type to PPM and UART.
- Pro-tip, I use a METR on the master and the DAVEGA X on the slave, the best of both worlds right :). With the FocBox Unity it’s also possible to use the Metr Unity module and DAVEGA in the external UART port at the same time.
It should also be mentioned that while the original DAVEGA was Open-Source, the DAVEGA X is not. From speaking with Jan about this topic specifically, here’s my take-away. At some point, especially on smaller projects such as this, there has to be a profit component. Building a few is fun, building 100 is work.
For Jan, I feel like this is a labor of love, and sure he expects to show a profit, but I doubt he expects it to turn into a full time job or pay his bills. If the DAVEGA X was OS then there are countless large scale manufacturers that could duplicate the build process and sell the end product much cheaper. This while using the code Jan developed. Given the issues and complaints with other OS projects in the esk8 arena, I can’t say I blame him.
If you’re interested in the OS DAVEGA then using an Arduino Nano is a good and very inexpensive option.
In closing, there isn’t anything that I can say I don’t like about this device. It’s inexpensive, robust, attractive and fills a need. If you’re like me, and like the ability to have instant data, this is definitely an option to consider. I give the DAVEGA-X 4.75/5.
More features are coming up. More customization of the UI is on the horizon. DieBieMS integration will happen soon & FlexiBMS integration may happen later.

USEFUL LINKS
To order a DAVEGA X go to davega.eu
Informative threads DAVEGA X: Accepting orders & DAVEGA X: Gauging interest
In the interest of full disclosure, during the development process both @LR-designs (aka Luke Ritchie) and myself designed housings for the DAVEGA. While both were used and tested rigorously, the @LR-Designs was copied by FlipSky for their production run of the DAVEGA with some changes, as it should have been since it was the most robust and easiest to build design…the dude designs great gear.

- Hoyt St Drive Train – The Cadillac of Esk8 drive systems - November 26, 2019
- DAVEGA X – Seductive Telemetry - October 22, 2019
- Why you should want Hummie Hubs and how to get them. - July 18, 2019
